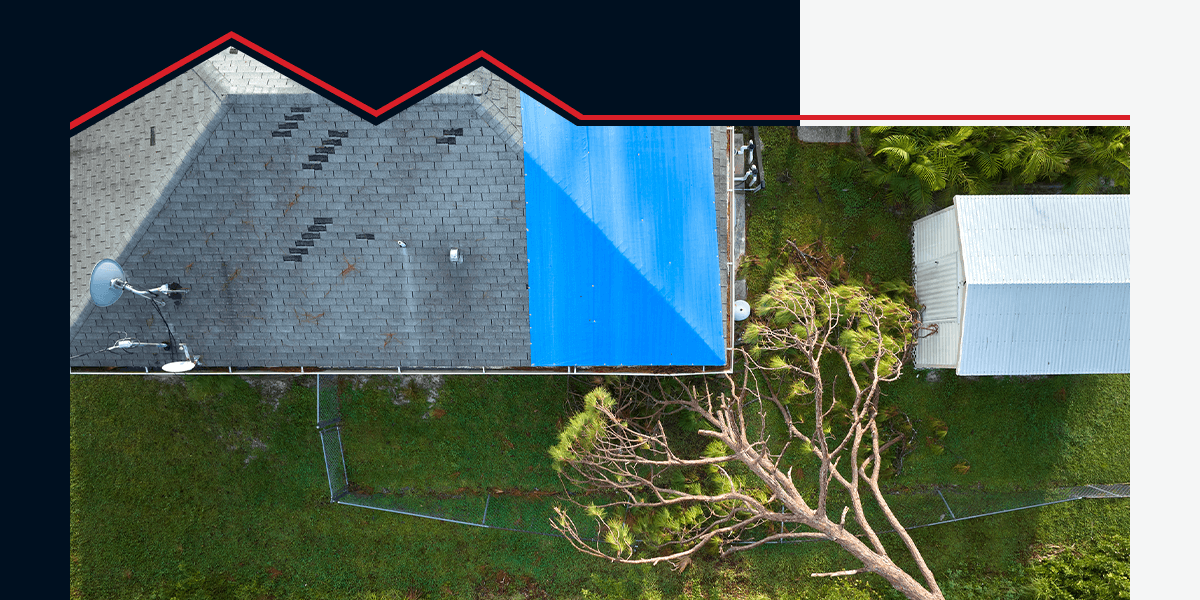
When a storm hits, your roof is the first line of defense for your home. Unfortunately, that means it can sometimes suffer the worst damage. Leaks, missing shingles, or even larger structural issues can quickly turn a manageable situation into a serious headache. That’s where emergency tarping comes in. It acts as a temporary shield while you schedule repairs, protecting your home and belongings from the elements and preventing further roof damage after a storm.
Knowing how to tarp a roof after a storm can be highly beneficial when you need to take immediate action. Here, we will guide you through roof tarping techniques and provide step-by-step instructions and essential safety tips to help you do the job correctly.
Assessing Roof Damage
Assessing the extent of the damage to your roof is a crucial first step in the tarping process. It will help you identify the areas that require attention and determine how much tarp and other materials you’ll need. Be sure to wait for the storm to pass before you perform the inspection and avoid working in high winds or rain.
Start with a visual assessment from the ground. Look for missing shingles, debris on the roof, and visible holes or cracks. You might also notice signs of roof damage from inside your home, such as water spots on your ceiling or walls.
Your roof will likely be vulnerable after a storm. As such, you should prioritize safety during your assessment. Avoid climbing onto the roof directly, as this could cause further damage. Instead, assess the situation from the safety of a sturdy ladder. If you’re unsure about the risks, reach out to a roofer for a professional inspection.
Gathering Supplies
Before you install temporary roof tarping, you must gather all the tools and supplies you’ll need for the project. Prioritizing safety and using the right materials are key to a successful tarping job. Here are some of the items you’ll need:
- Measuring tape: This is the most effective tool to measure the damaged area and determine the appropriate tarp size.
- Heavy-duty tarp: Choose a weather-resistant tarp that’s large enough to cover the damaged area with plenty of overlap.
- Wood planks: You can use these with roofing nails or screws to secure the tarp in place.
- Roofing nails or screws: These fasteners will securely hold the tarp without damaging the roofing material. You should opt for weather-resistant cap nails.
- Gloves: Roofing work can be rough on your hands. Gloves protect against cuts, scrapes and blisters.
- Safety harness and rope: Working on a roof can be dangerous, so equipment to prevent falls is essential. A safety harness and rope can save your life.
- Nonslip shoes: These shoes provide the necessary grip to prevent slipping and minimize the risk of falling.
- Ladder: To access the roof safely, you need a sturdy ladder. Ensure it’s the right height and properly positioned.
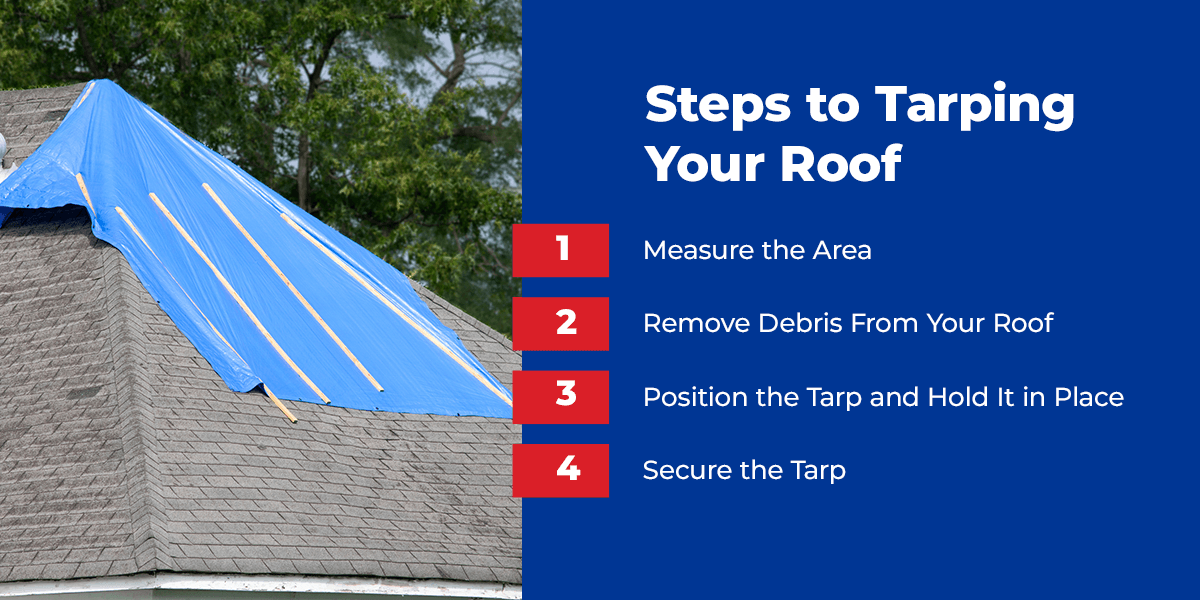
Steps to Tarping Your Roof
Once you’ve gathered all your supplies and made preparations, you will be ready to start the process. Here’s a step-by-step guide on how to tarp a roof after a storm.
1. Measure the Area
Start by measuring the damaged area on the roof using a tape measure. Accurate measurements are essential for determining the tarp size you’ll need. As a rule of thumb, the tarp should extend beyond the affected area by 4 feet on all sides to provide proper protection. The extra coverage will prevent water from seeping under the tarp’s edges and causing further damage.
2. Remove Debris From Your Roof
Depending on how severe a storm is, the strong winds can cause falling trees, leaves, and other flying debris to land on your roof. This debris can cause physical damage and prevent proper draining. Before placing your tarp, carefully remove the debris and other rubble, like broken roofing materials. Clearing the area creates a smooth surface for the tarp to rest on.
3. Position the Tarp and Hold It in Place
The next step is to position the tarp over the damaged area carefully. Secure the tarp from the roof’s peak and unfold it to cover the space, making sure it overlaps the undamaged surfaces. Stretch the tarp tight and smooth out any wrinkles or folds.
Positioning and holding down a tarp is a two-person job. It’s best to enlist a helper to hold the opposite side of the tarp, preventing it from slipping or blowing away. Once the tarp is in position, you need to weigh it down and secure it to prevent it from loosening and coming off the roof. Use wooden planks along the roof’s peak to secure the upper edges of the tarp.
Other roof tarping techniques may employ sandbags to weigh down the tarp, but wooden boards are generally preferred since they are more secure.
4. Secure the Tarp
Secure the tarp in place by nailing down the wooden boards. Start by wrapping the edge of the tarp around a board and nailing the materials together. Attach the board to the roof with roofing nails or screws, making it a temporary anchor. Make sure the nails are long enough to screw through the tarp, shingles and roof decking. You can also sandwich the tarp by nailing another board over the first one. The goal is a tight, secure seal that will withstand wind and rain.
Depending on the extent of the damage and the area you need to cover, you may need to repeat the process a few times.
When to Call a Professional
Temporary roof tarping needs to be installed properly to work effectively. While the process is straightforward, some situations call for expert attention. Here are a few instances where you should consider hiring a professional to tarp your roof:
- Safety concerns: Roofing projects can be dangerous, especially when surfaces are slick after a storm. Falls are a potential risk since you’re working at heights. If you’re uncomfortable climbing a ladder or working on a sloped surface, it’s best to leave the job to a professional.
- Extensive damage: If your roof has significant damage, such as a large hole or structural damage, let a professional handle the job. Expert roofers have the experience and equipment to safely and effectively tarp the roof.
- Lack of expertise: If you’re not confident in your ability to properly tarp a roof, consider hiring an expert. A poorly installed tarp can do more harm than good.
Trust AmeriPro Roofing for Emergency Roof Repair
Are you dealing with roof damage after severe weather conditions? Let the professionals from AmeriPro Roofing protect your family and your home with our emergency roofing services. Our team can assess the affected area and expertly cover it with high-quality tarping materials, preventing further roof damage after a storm. We will also handle the repairs to restore your roof’s functionality and appeal.
We have locations in multiple states, so you can easily find an AmeriPro Roofing near you. Contact us to schedule a complimentary inspection or request emergency tarping today.


")